
Inserting an image
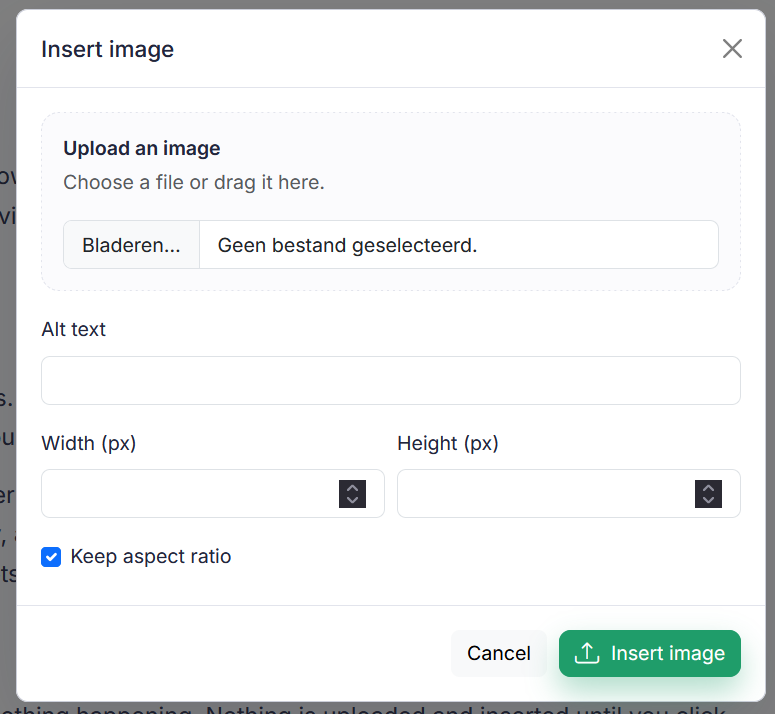
Upload an image or drag it into the dialog, give it alt text and optionally adjust the dimensions. The alt text appears on the knowledge base as a caption below the image.
Short answer: click the image button in the toolbar. Choose a file from your computer or drag it into the dialog, add alt text and click Insert image. The image appears at your cursor.
The alt text
The alt text describes what the image shows. On your knowledge base that text also appears as a caption, in the blue frame below the image. It helps visitors who can't see the image and gives your image a tidy caption at the same time.
That makes the alt text copy your visitor reads, and not just something for screen readers and search engines. An alt text like screenshot-2 or image1.png therefore sits literally underneath your screenshot on your Help Center. Write it as a caption: one short sentence explaining what the reader is looking at.
Leave it empty and you still get the frame, just without a caption. Nothing breaks. And this only applies to an image that stands on its own, on its own line. Put an image in the middle of a sentence and it's left alone: no frame and no caption.
Adjusting the dimensions
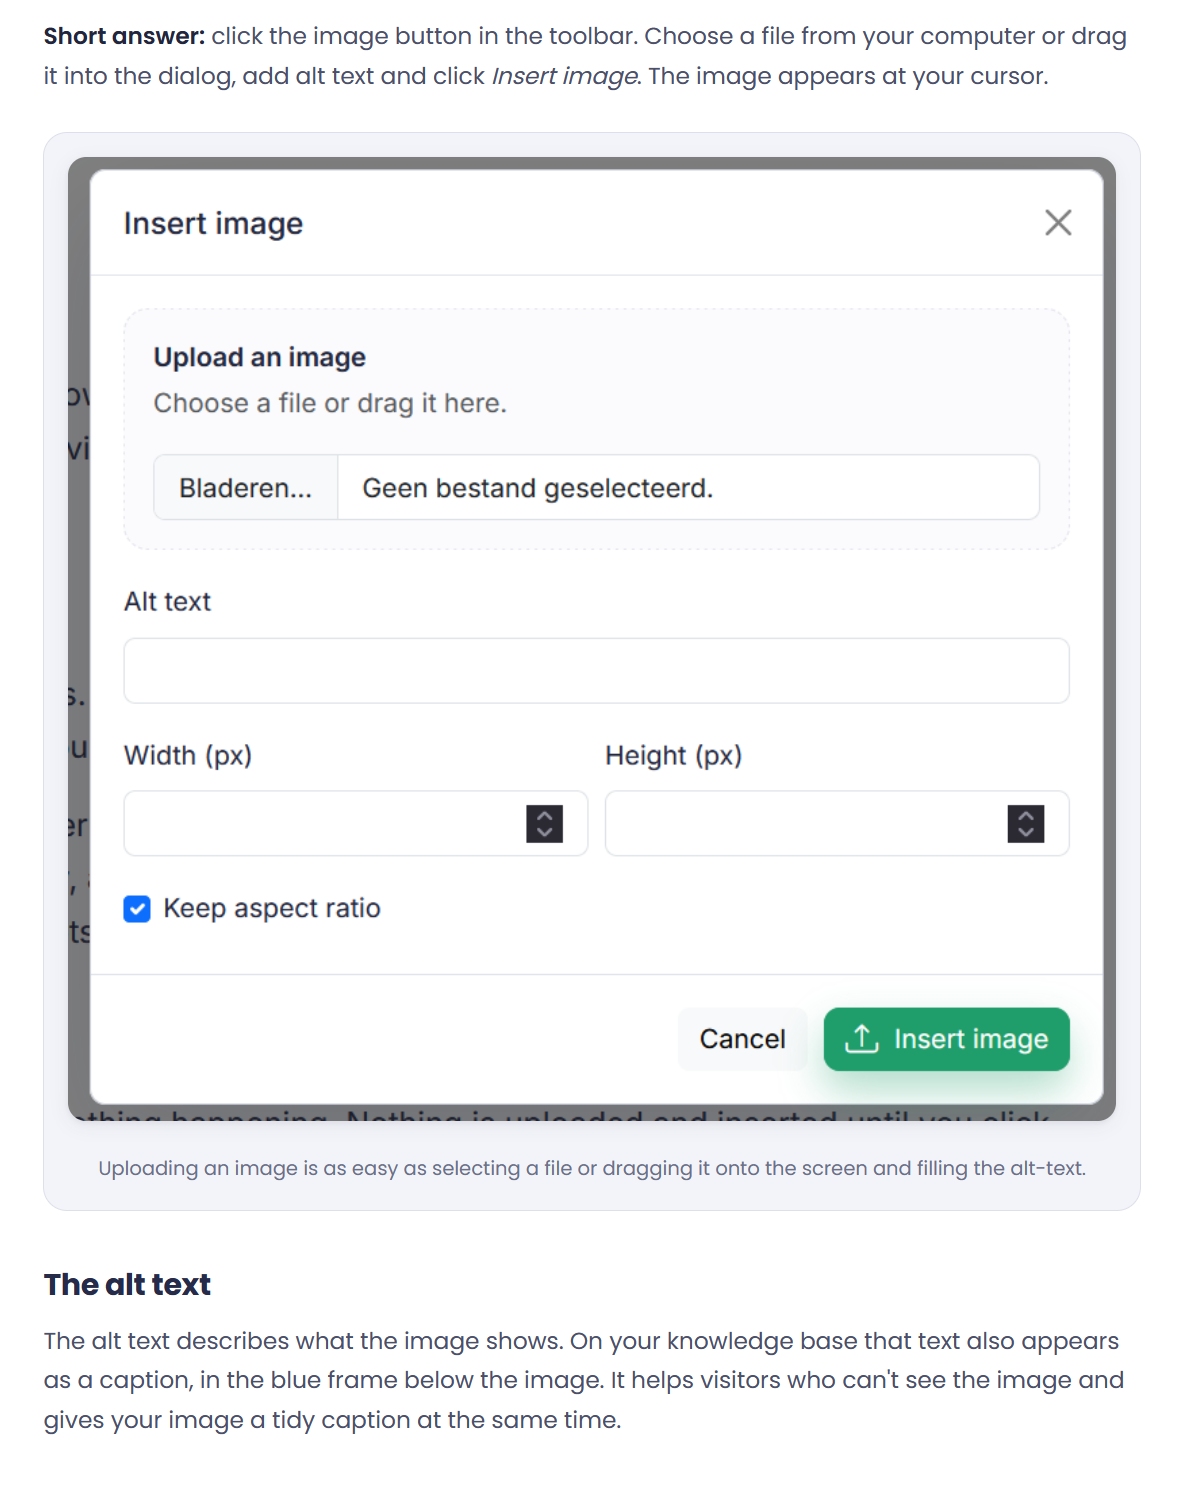
You can set the width and height in pixels. An image is never displayed wider than the maximum width of an article on the knowledge base, even if you enter a larger value.
The Keep ratio checkbox decides whether the image stays in proportion. With it on, if you adjust the width the correct height is calculated automatically, and the other way around. Turn the checkbox off and you can set width and height independently, which lets you stretch the image.
Good to know
Click Cancel and the dialog closes with nothing happening. Nothing is uploaded and inserted until you click Insert image.
Also searched as
"add a photo to an article", "upload an image", "caption below image", "make an image smaller", "set alt text"
See also
Was this article helpful?
Your feedback helps us improve this article.
Thanks for your feedback!
